

One-stop Lorex Camera Setup Guide
Learn How to Install Lorex 4k Camera System in Easy Steps
You might probably have heard of Lorex cameras. A Lorex Camera setup can be your perfect companion when it comes to recording real-time updates about your house. You can always connect your camera to the WiFi connection at your home and start saving the recordings to the cloud. If you have recently purchased a new lorex security camera setup, learning how to get it working will go a long way in ensuring 24/7 surveillance. This page will walk you through the Lorex camera setup instructions.
How to Install Security Cameras Outdoor?
You can install your cameras using the Lorex camera app setup method. If there’s one thing that makes using these cameras easier is the Lorex app. Now, if you are looking for details on the Lorex camera app, information on this page is all you would want to read.
Connecting lorex security cameras and accessories
You can follow the steps on the Lorex home app and add your camera and accessories. While you can always refer to the camera documentation that arrives with your camera, the steps mentioned here can also be referred to. Search the camera’s model number to access the product support page.
Important:
Make sure your Lorex camera setup is connected to the Lorex Home app. If you are installing any accessories, make sure they are connected as well, on the same app account. In addition, you’ll also need to ensure that they are connected to the same network. Save your device password associated with the lorex camera and accessories.
Lorex Camera App Setup
If you were wondering how to setup lorex camera on phone, the Lorex Home app is your answer. Here are some steps you can follow to configure your Lorex setup using the app:
- Open the Lorex Home app on your smartphone and log in to the Lorex account.
- Once the app interface launches, tap on the + icon to add your WiFi camera.
- Power your lorex camera now and scan for the QR code on the same. If you wish, you can manually enter the device ID to connect the camera.
The app will now walk you through some easy steps to complete the camera setup process.

Connecting Lorex Camera Setup to the recorder
You can connect up to two lorex wireless security cameras to two of the recorder channels. Make sure you have these two channels available. Below is how to set up lorex camera system on computer:
- Login to your Fusion recorder using the lorex.login or Lorex com portal.
- Use the default lorex camera setup credentials. The username is admin and the new secure password is password.
- From the live view display, right-click to open the Quick menu and then click on the Camera Registration button.
- Click on the Device Search option now.
- Check the radio button next to the WiFi device at your home and click on the Add button.
- The wifi network will now be moved to the Added Devices list. You can now click on the Pencil icon underneath the Edit button.
- Type in the WiFi device password and click on the Connect button. Now, click on the Ok button.
Once you have connected to the recorder, the connection LED on the WiFi camera will turn green. You can adjust the camera’s recording settings to turn off the duplicate notifications and link motion sensors to cameras.
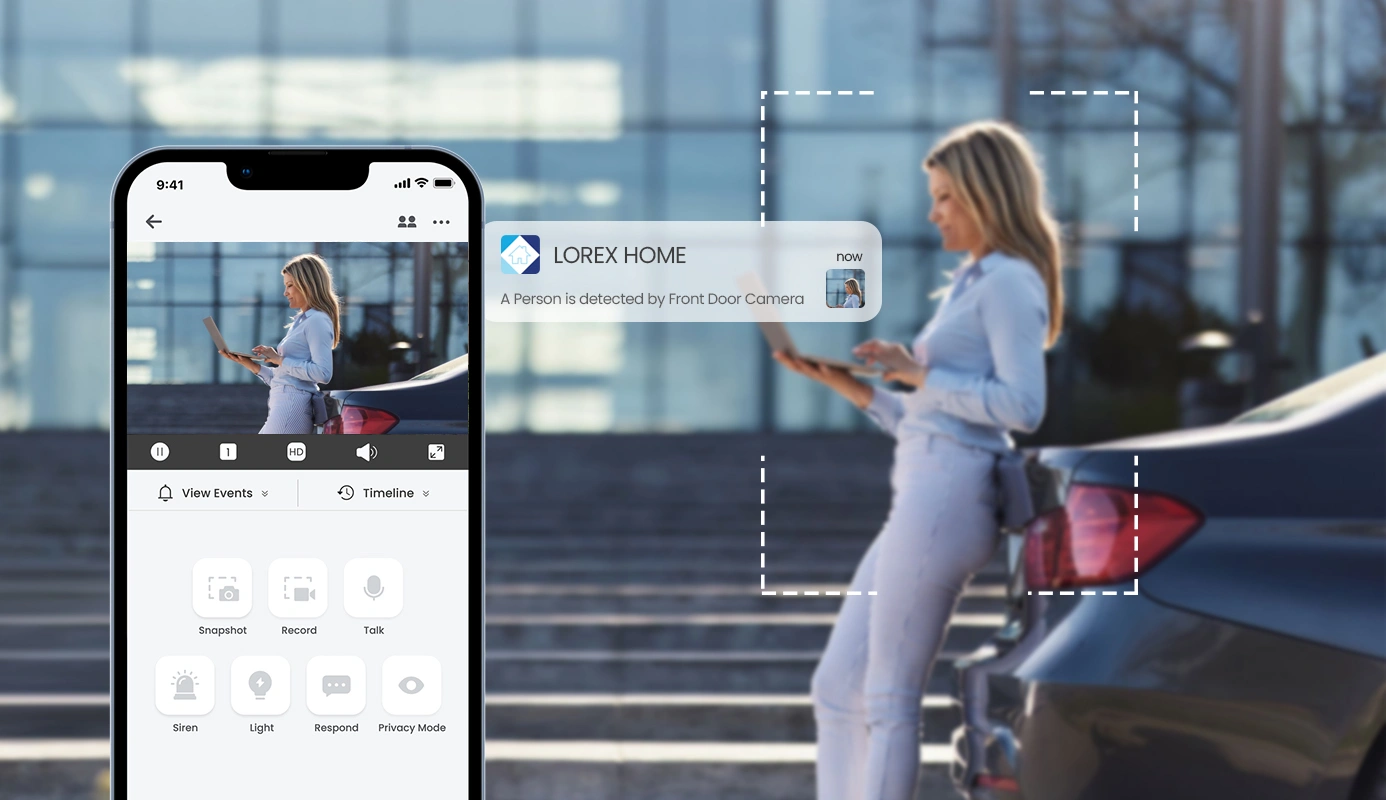
Lorex Camera Motion Detection Setup
- Launch the Lorex Home app on your smartphone.
- From the Devices tab, tap on the Settings icon next to your WiFi camera to access the device settings. Now, tap on the Detection Settings menu.
- A new window will now appear on the screen. You will see different options.
- Turn the toggle button next to the Motion detection option to the ON position. Once enabled, you can also set the sensitivity level of motion detection from the Motion Sensitivity option.
- The settings will autosave themselves and you can exit the app.
The lorex camera system setup is now complete and you can mount the camera at their desired locations to proceed with monitoring.
Troubleshooting Lorex camera setup issues
While you are trying to configure the lorex camera system setup or the lorex doorbell camera setup, or the lorex cloud camera setup, you may come across issues that may prevent access to the camera. Issues like:
- Lorex Camera Offline on App
- Lorex Home App Notifications Not Working
- Lorex App Not Working
- Lorex Camera Not Working on App
and more, can be resolved easily. Here are some basic troubleshooting steps you can follow when trying to troubleshoot the device.
Default Lorex Admin Credentials (If Not Changed)
- Make sure that the Lorex Camera setup and the recorder device are connected to the same Lorex app account. Also, check if both are connected to the same network. If you are facing issues with the wireless connection, try using an ethernet cable to connect the recorder.
- Restart your camera and the recorder device to rule out the chances of WiFi issues causing trouble.
- Check if the Lorex camera recorder firmware is updated to the latest version. You can log in to your recorder and navigate to the system settings. Here, select Update and reset and go to the Upgrade option. Now, click on the Check for Updates option.
- Connect the Lorex Camera setup to the available WiFi channel and not with a channel that has a WiFi device already connected to it.

Need more help with the Lorex Camera Setup process?
Reach out to the support team at our end today!
FAQs (Frequently Asked Questions)
What is Lorex App and How it Works?
Lorex App is the smartphone based application that makes managing your Lorex cameras easier. You can get the app from the official Lorex website or download it from all the leading app stores like Google Play Store and Apple App Store, etc.
It works using the internet. Once you have installed the app on your smartphone, it will collect details related to your Lorex camera account and then help you complete the Lorex Camera setup. The app also provides different steps to manage your Lorex cameras like lorex camera motion detection setup, viewing the recorded videos and more. The app can also be used to perform advanced functions like camera reset, etc.
How to Download the Lorex Camera App?
You can download the Lorex camera app from the Google Play Store or the Apple App Store. Simply, launch the respective application store on your smartphone and then search for the name of the Lorex App. Once you have access to the same, you can click on the Download/Install button. The app download and installation will be processed. Allow some time for it to complete. Once installed, you can launch the app to start using it.
Alternatively, you can also download the Lorex app from the official Lorex website. Head to the https://help.lorextechnology.com/ URL and you’ll find links to download the Lorex Home App, Lorex Cloud App, and the Lorex Cirrus App. You can click on the name of the respective app and it will take you to the download page, automatically.
If you are looking to use the Lorex App on your SmartTV, you’ll first need to understand what OS is installed on it. For Android enabled smart TVs, you can download the app from the Play Store. While for others, you can download a trusted and reliable app simulator like BlueStacks. Once installed, open it to follow the lorex camera setup instructions.
How to Add Another User to Lorex Home App?
- Launch the Lorex Camera App on your smartphone.
- Now, tap on the Device Settings icon.
- Scroll down on the screen and select the Share Device option.
- The Share users window will appear. Tap on the + icon or Add button from the top right.
- Type in the email address of the user you wish to add and select Ok.
- You will now receive an on-screen prompt reminding you that the user has access to live view, timeline and notifications. Again, tap on the Ok button to continue.
- Once the device sharing process is complete, you’ll receive a Successfully Shared message on the screen.
A user has been successfully added on the Lorex app. The select user will now be able to see the video recordings once they have downloaded and installed the app on their device.